


My goal with this article is to help you learn React. We will create a small twitter clone. I will guide you on how to build your own app step-by-step and I will try to teach you all the little details you need to get started.
If you never tried React before in your life, this will be a good starting point for you. If you know already the basics of React, you may find this article boring at best.
You can fork my GitHub repo: @nicotsou/react-twitter.
Found something strange? You can suggest changes by creating issues. Pull requests are also welcomed. This tutorial is also available in my blog repo.
To follow this guide you must have Node.js installed. Any version above v10 will work just fine.
One last thing. For making my tutorials easier to read, I always remove the ; semicolons in my code snippets. In spite of the fact that they are not really needed, you will find them in the actual project.
Ready to write some code? OK, let’s go! 🐤 🤩
Create a React application
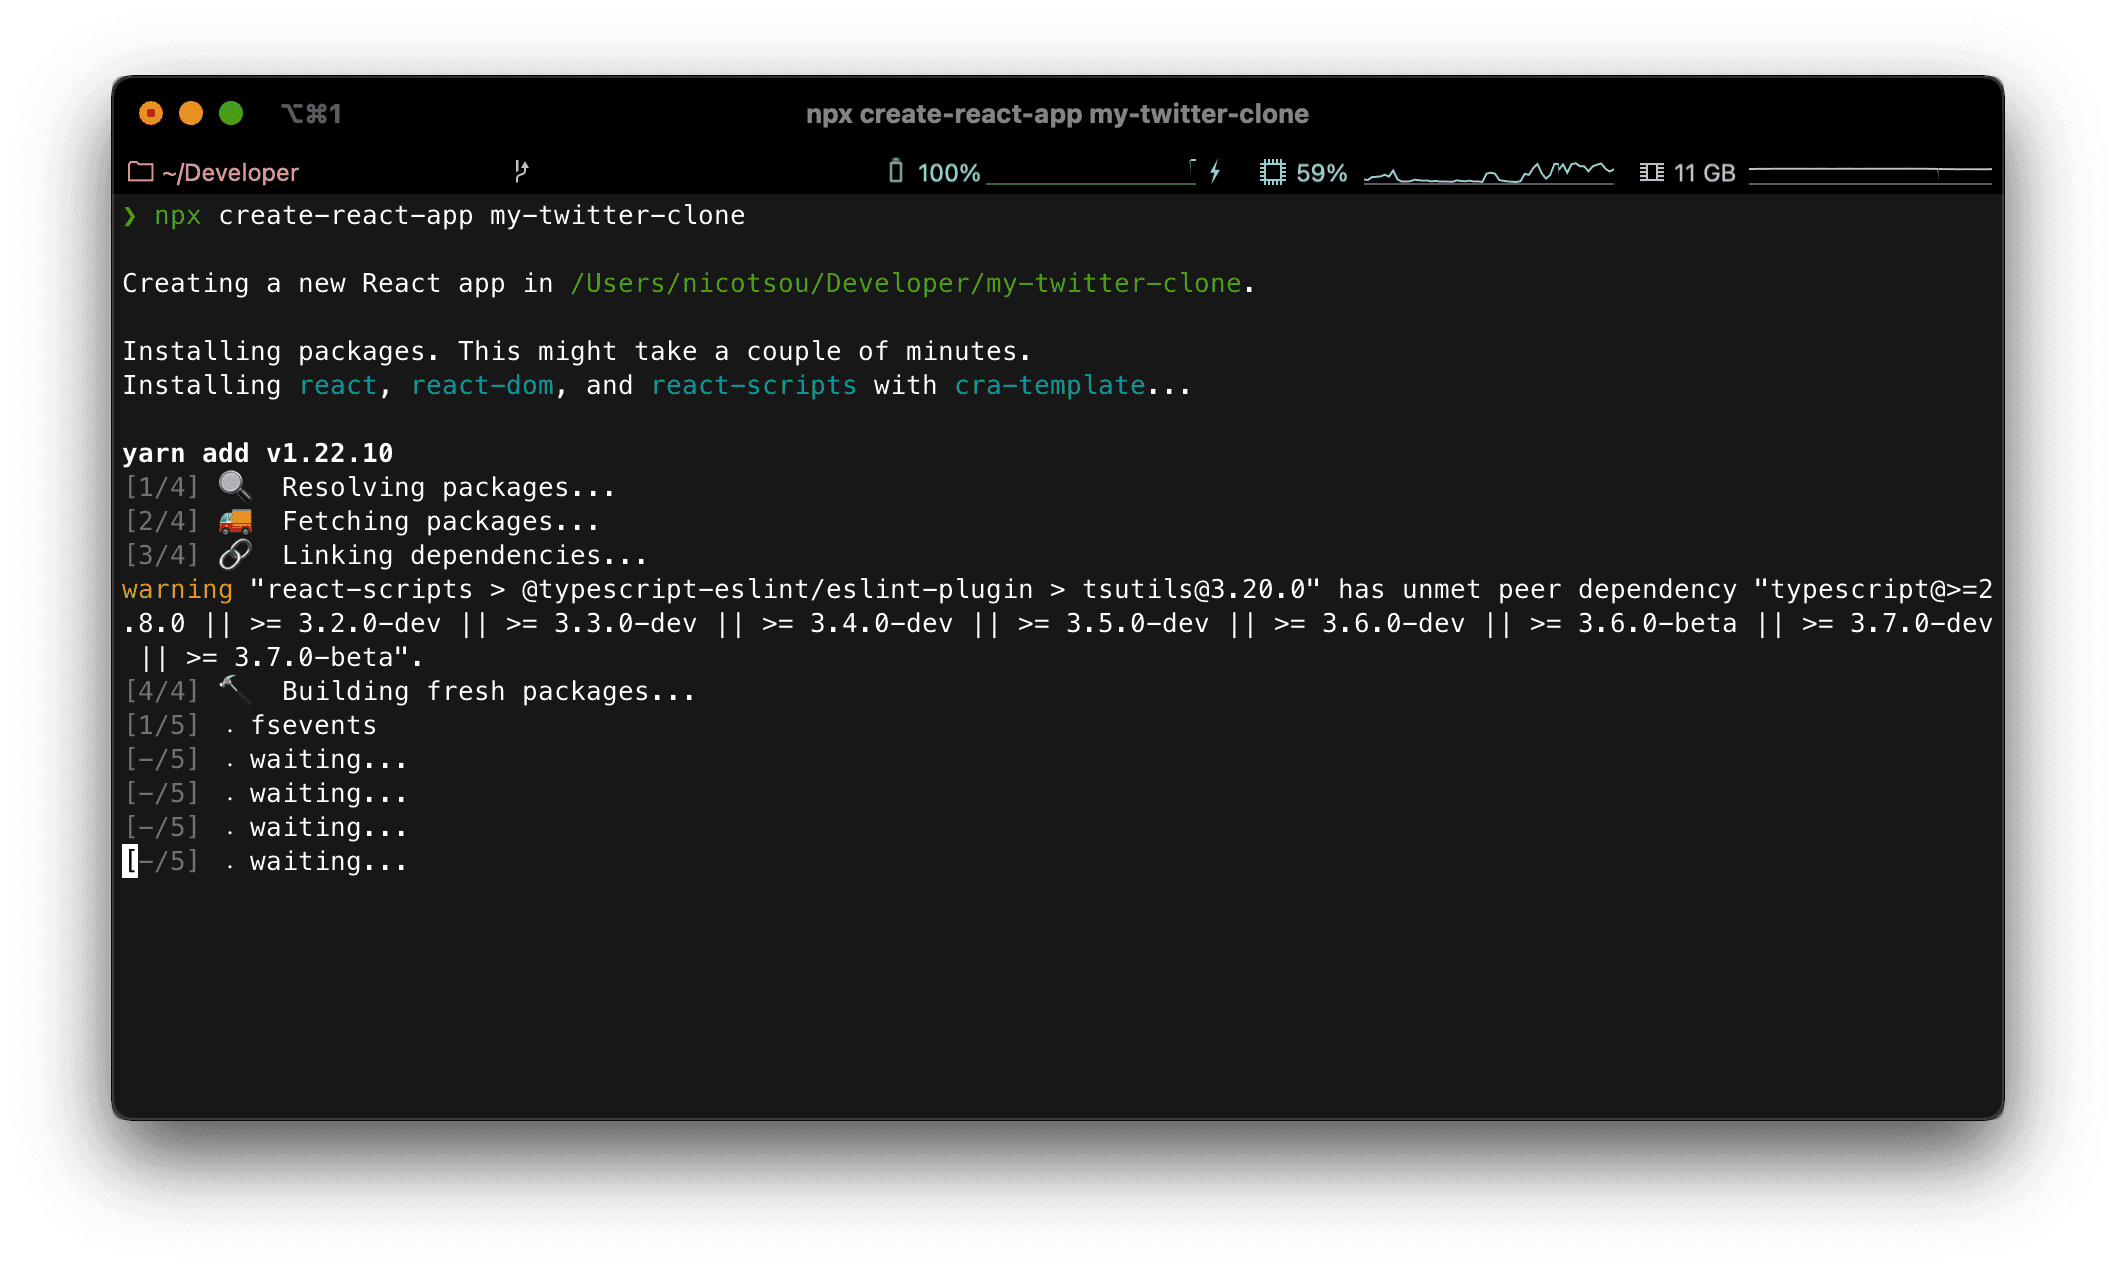
Open your terminal, move to your development directory and run the following command:
npx create-react-app my-twitter-cloneThe following prompt will appear. Accept the installation and take a small ☕️ break. The installation will take some time, especially if you don’t have any React projects in your system.
This will create a subfolder with all the files we need to run our newly created React application:

Let’s have a closer look at the initial folder structure:
/node_modules: This hosts all third-party npm packages that are needed in order to run and deploy our application. This folder is ignored from git. Sometimes it makes sense to delete it and runnpm install. re-create it./public: This folder hosts public static files. The best place to put favicons, iOS icons or any other complementary file./src: This holds the source code of our application. We will work here to build our application.
How to run the application
Give it a try! The application is pretty functional.
At first you have to navigate inside the application folder:
cd my-twitter-cloneThe only thing you have to do is to run the following command:
npm startNow wait a bit. Your JavaScript application is building. Since our app is pretty small, this will not take much time.
If your firewall prompts you about allowing this application to access networks, press accept.
In seconds you will notice a new browser tab with the following page. If not, try to visit http://localhost:3000/.
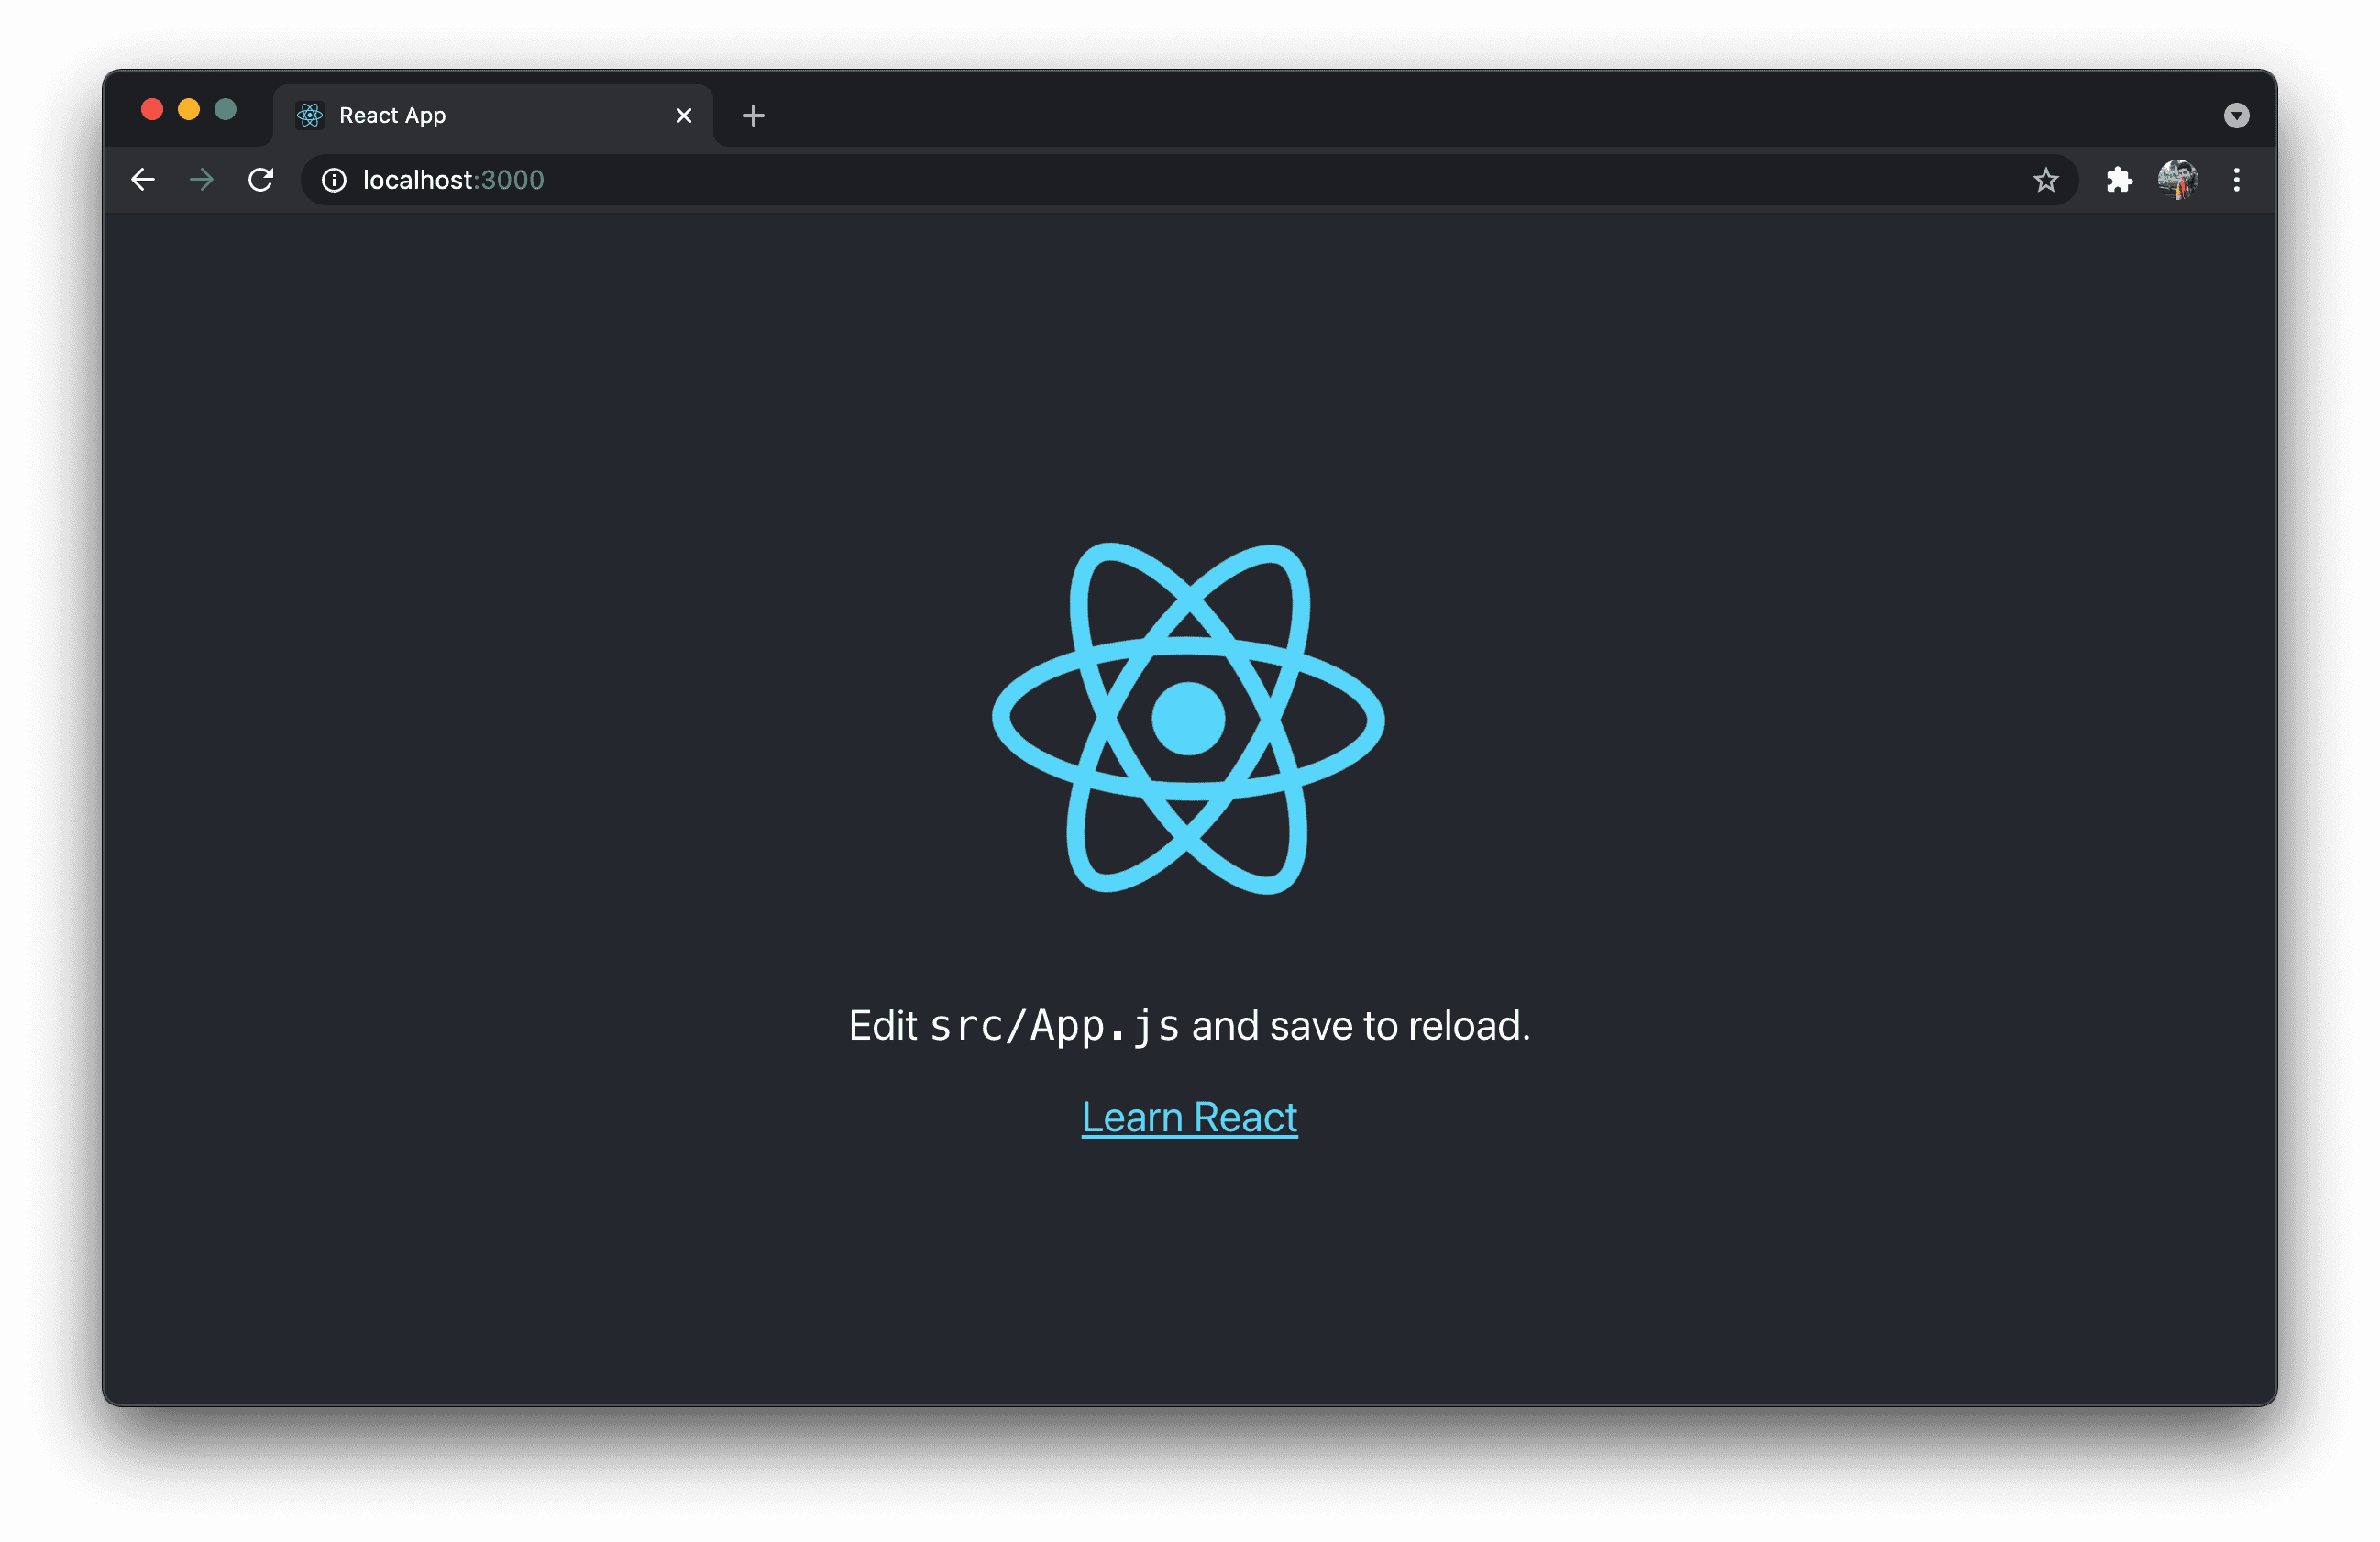
The application is running successfully and you can interact with it. Well, there’s nothing to interact with at the moment, but we’re gonna change that soon.
Now try this one. Edit /src/App.js file. Change some of its text and save it. Notice that as you save the file, the changes are being reflected to your browser window automatically. That’s the best way to test our application in real time.
Stop the application by running Ctrl+C on the terminal window.
I want you to delete all the files inside the /src folder. We will recreate them one-by-one in the following section.
Now it’s time to write some code. 👨💻
Render the React application
In this section we will write all the elements that are needed in order to run our app. It’s better to spend some time to understand what is happening under the hood.
I want to give you an overview of how React works. Unfortunately in this article we can’t explain everything in detail. But I have selected a bunch of nice articles you can read at the end of this experiment.
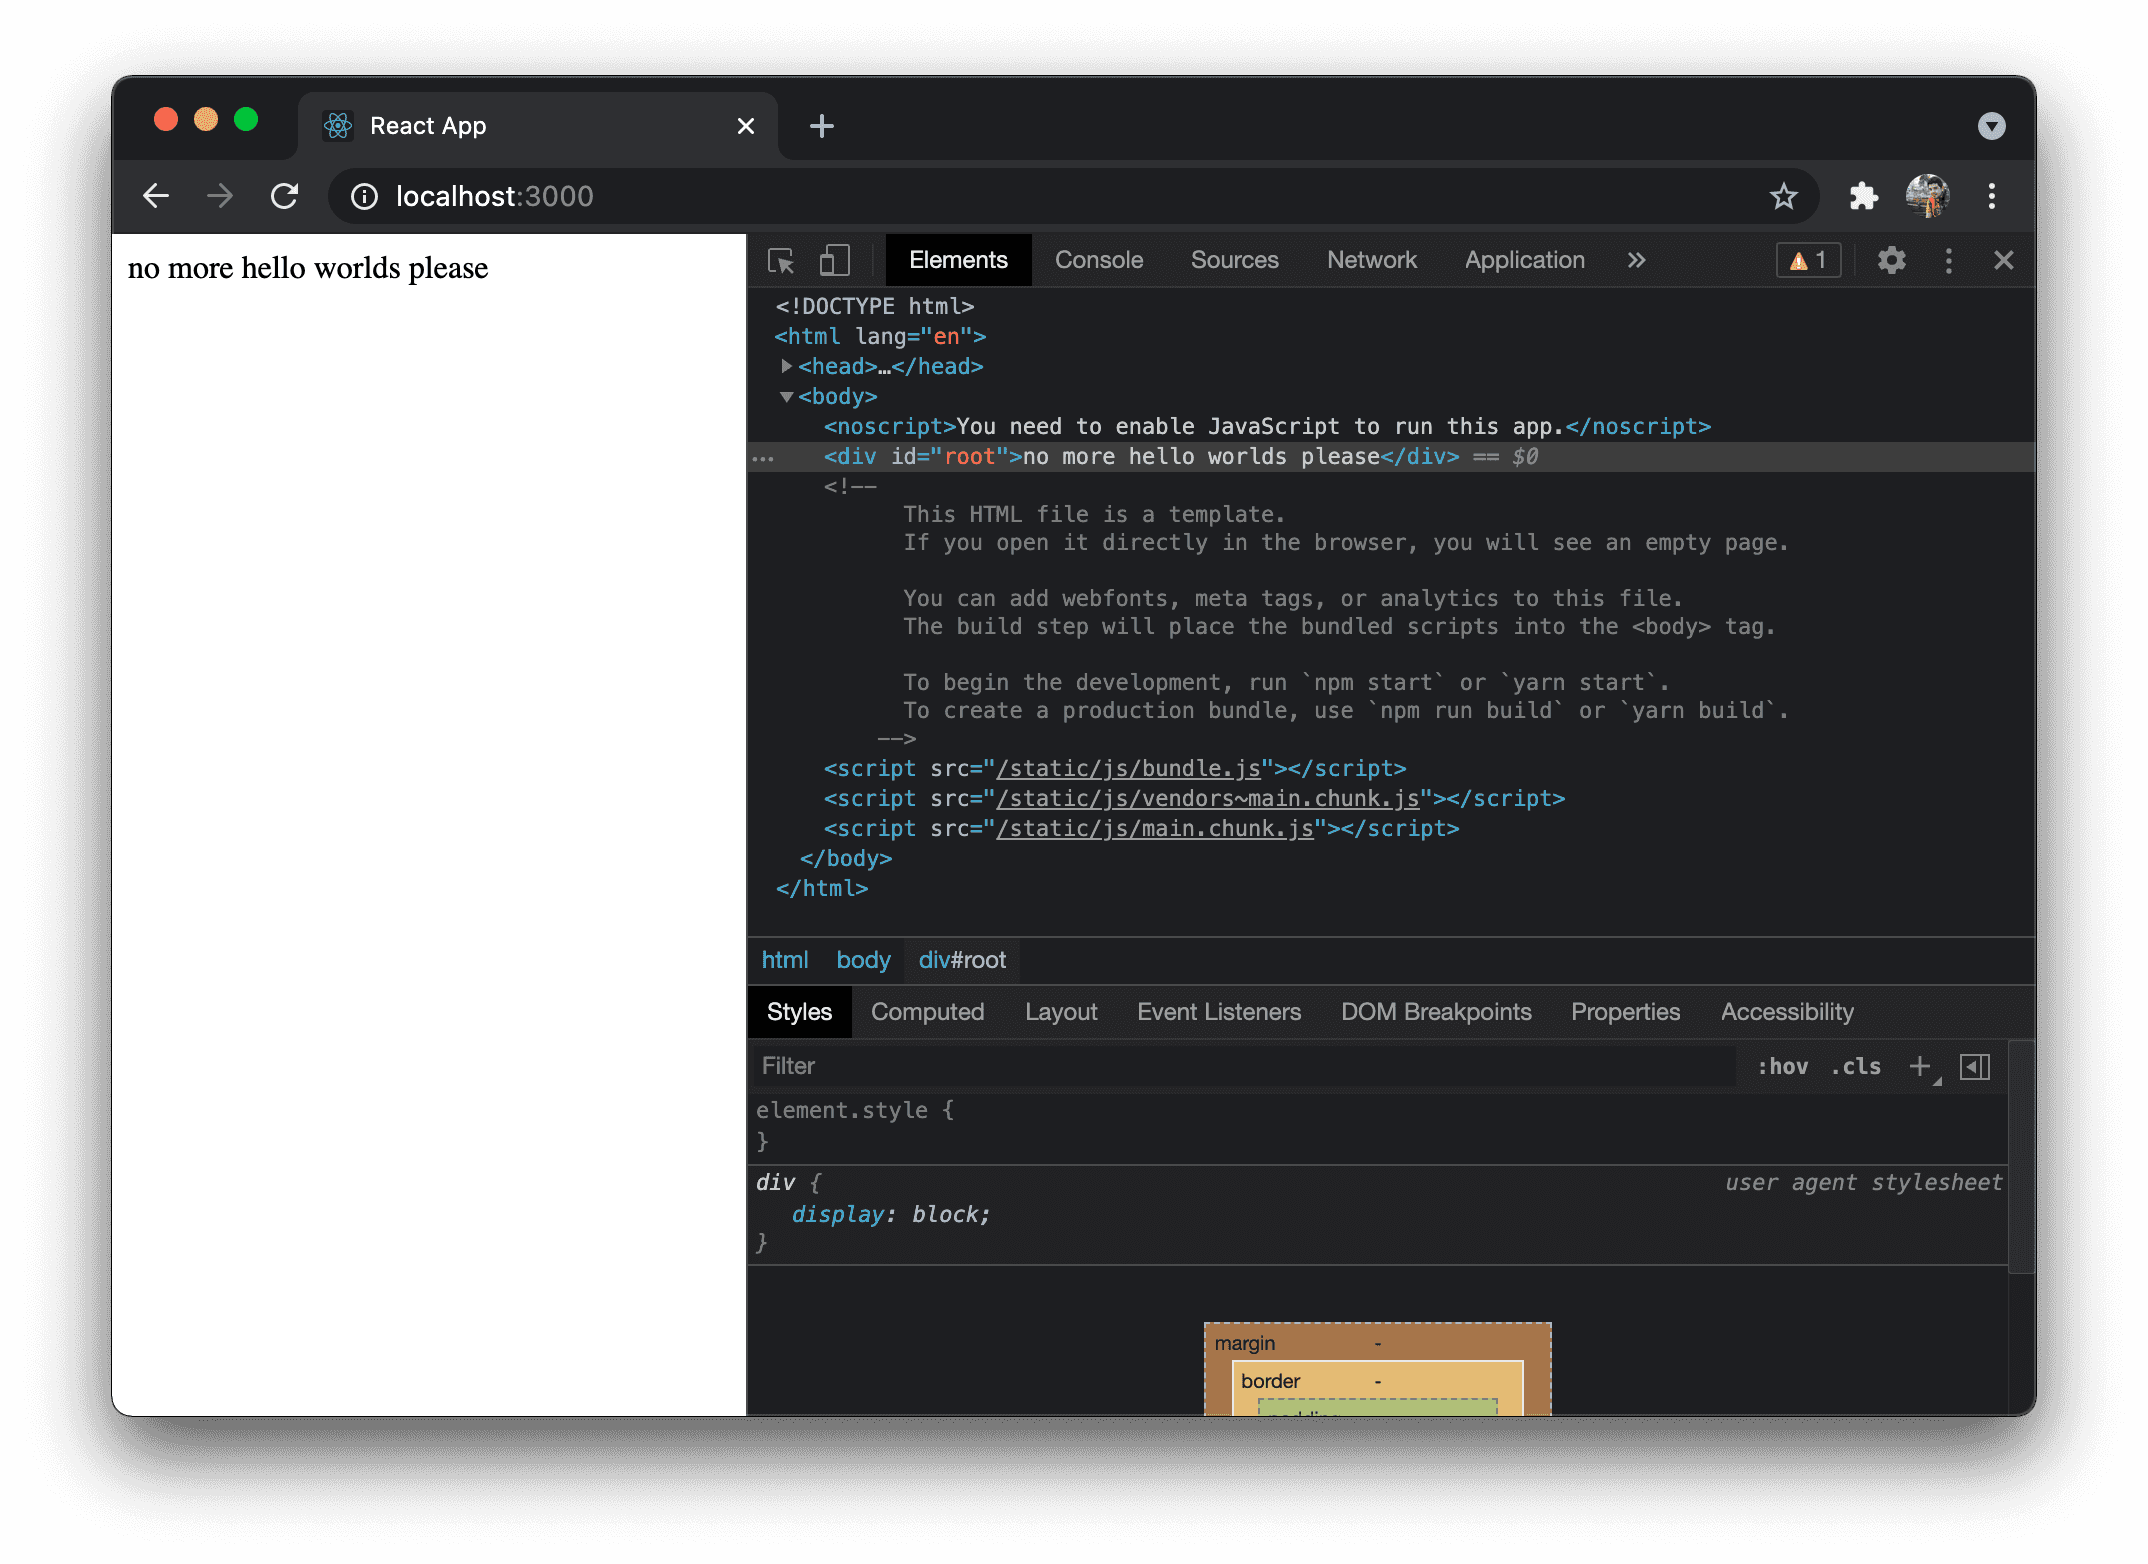
In our public folder you will find an index.html. Search for the following div element:
<div id="root"></div>This is basically where we are planning to render our React application. The root element.
React gives us an easy api to place React applications in our existing html elements. You just register them and you forget about them. React will manage all DOM changes for you inside those elements, but it will not touch anything outside.
The part of the React library that is handling DOM is called react-dom. Let’s see how we can use it.
By the way. If you are thinking now to change the favicon with the one from twitter, I would not judge.
To render a React element, create a new file /src/index.js:
// index.js
import ReactDOM from 'react-dom'
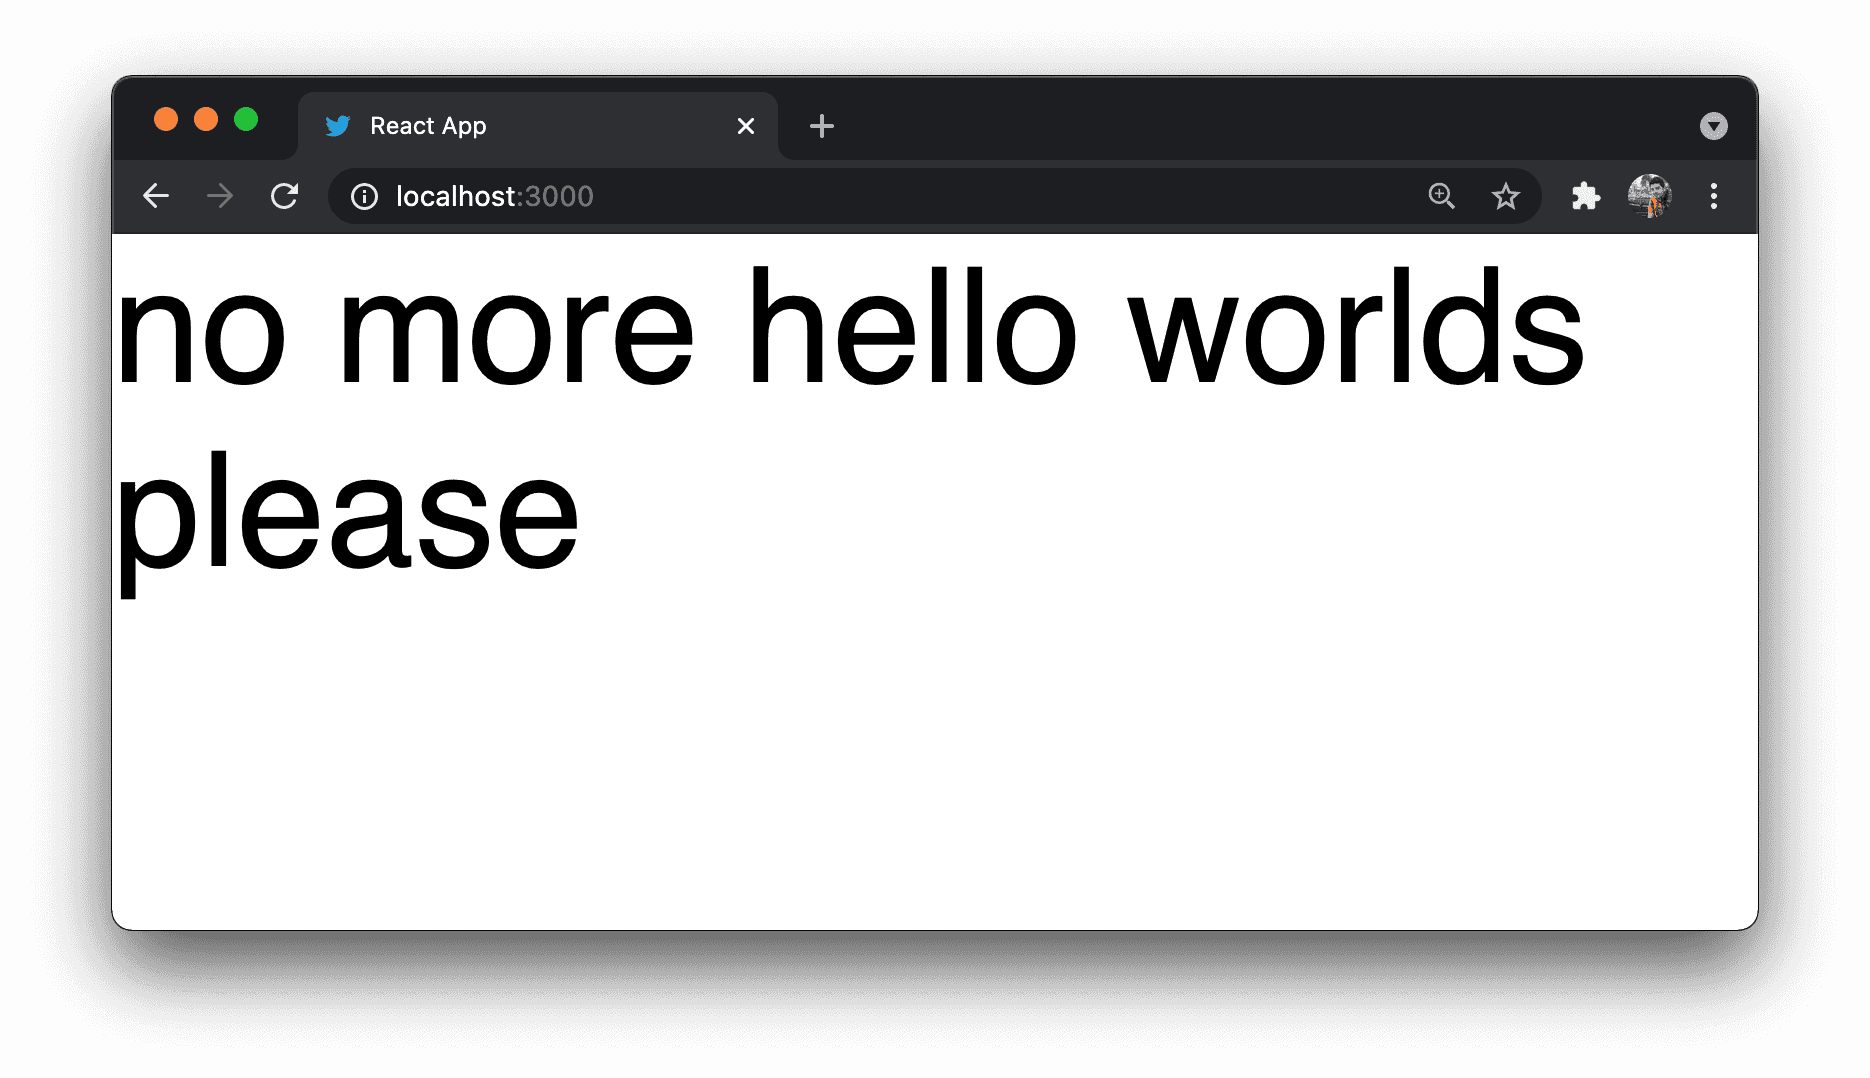
ReactDOM.render('no more hello worlds please', document.getElementById('root'))Go ahead and run the application. You should see our friendly message.
Note that changes specifically to this index.js are not being automatically transferred to your browser window. You will have to manually refresh the page every time to see the changes.
The method ReactDOM.render() takes the following parameters:
- The React component we want to render.
- a DOM element in which we are planning to render the markup (render output).
ReactDOM is the one who will take care of updating the DOM as we dynamically make changes. At the moment it will display the following message:
We haven’t defined a React component yet. Let’s do so:
import React from 'react'import ReactDOM from 'react-dom'

// This is our first React component
function App() {  return <div className="App">no more hello worlds please</div>}
// We use <App /> as the root React component to render
ReactDOM.render(<App />, document.getElementById('root'))
Here we imported the core react library. This one allows you to create and manipulate React components. It hosts all the core react features, except everything DOM or mobile related.
You have to import this library, otherwise your JS runtime will not be smart enough to understand the syntax inside the function App().
That’s JSX. It basically allows us to write HTML inside JS. It has almost the same syntax, with some minor differences.
Our first component is named App and it will be the root component of our application. React allows you to write components in the form of JS functions. Simply use the return statement to return what you want this component to display on screen.
Every React component renders something on screen. If you don’t want to render something, then you can use a plain JS function instead of a React component.
You can create as many components as you want. You can nest components within other components to declaratively express your UI. Similar to how you write HTML.
In the next section we will do exactly that. We are building a twitter clone, so we will definitely need some React components to display its UI.
But first let’s fix some minor issues.
There’s nothing cool with Times New Roman or whatever the default serif font is in your OS.
Let’s make it nicer by adding the following file under /src/index.css:
body {
  margin: 0;
  font-family: sans-serif;
}
Ok now it’s more UIsh… We also removed the default margin in body.
To see the changes we will have to import this css file in our main index.js:
import './index.css'Now you will be wondering, what the hell? We import a css file inside a JS file? How this is even legal?
Well, it is working perfectly if you refresh your browser. And that’s because your react application is using a bundle loader called webpack. Pretty awesome isn’t it?
If you managed to do everything your codebase will look like this: https://github.com/nicotsou/react-twitter/tree/step-1.
Now let’s implement that 🐤 twitter app.
Display some tweets
It’s time to show those tweets! Now it will get more interesting. 😁
Since this will be a very simple app without any api integration, I have prepared some initial data for you. It’s basically a json file with a list of tweets in it. To make things easier, copy its contents in a new file src/tweets.json.
Now we can move the implementation of the <App /> component to a new file. In general, it’s a good practice to keep every React component in its own file.
As a first step, we will update the index.js as follows:
import React from 'react'
import ReactDOM from 'react-dom'
import App from './components/App.jsx'

import './index.css'

ReactDOM.render(<App />, document.getElementById('root'))
Now, let’s create another file /src/components/App.jsx. Type the following code in it:
// App.jsx
import tweets from '../tweets.json'

function App() {
  return (
    <div>
      {tweets.map((tweet) => (
        <span>tweet.content</span>
      ))}
    </div>
  )
}

export default App
Here we are leveraging the map() function to loop through all the tweets. That’s how you loop elements in JS. Which brings us to an important observation.
React is just JS. There’s no pseudo code for us to remember. React basically embraces you to learn JS.
We imported the list of the tweets from a json file. Similar to css, Webpack can handle other filetypes too. One of these filetypes is the .jsx. This is a common pattern to name React components. It’s not mandatory though. You can use .js.
Note that a React component must always return a single root element. In our case this is a <div>. Try to remove it, it will fail. Try to return more elements at the same level, it will again fail. One React element at the root level. Simple rule right?
You may ask why this is a React element and not an HTML element. Well, it looks alike because they both use the same tag name <div>. But don’t let it fool you.
React has one React element for every HTML element that is available. When you return <div>text</div>; you are not returning an DOM element. You are returning a React element.
The react-dom library (the one we declared before in index.js) will take all these React elements, render them and this will produce the corresponding DOM tree. Another important thing to have in mind. A small detail, but it makes a lot of difference.
There’s another thing that is missing.
If you check the console in DevTools you will see the following warning message:
Warning: Each child in a list should have a unique "key" prop.React also provides you a link to the associated article in their documentation.
Basically, React internally creates an auto generated key for every element. This key is being used in order to associate the actual DOM elements with the React elements. When you are dynamically rendering a list of items, React isn’t able to generate keys automatically. It simply cannot distinguish those elements because there’s no common attribute.
In order to help React recognize what is being rendered, we need to manually add a key attribute:
function App() {
  return (
    <div>
      {tweets.map((tweet) => (
        <span key={tweet.id}>tweet.content</span>      ))}
    </div>
  )
}
This key is a reserved prop for every React component. The key has to be unique, otherwise React will not be able to update the DOM correctly.
Now let’s add some structure:
import tweets from '../tweets.json'

function App() {
  return (
    <div className="timeline">
      {tweets.map(({ id, user, created_on, content }) => (        <div key={id} className="tweet">          <div className="tweet-header">            <span className="tweet-user">@{user}</span> ·{' '}            <span className="tweet-created-on">{created_on}</span>          </div>          <div className="tweet-content">{content}</div>        </div>      ))}    </div>
  )
}

export default App
Here I used classes to differentiate the divs. We will add the corresponding styles later.
Take a look at how we retrieve the data from tweets. We use a cool new syntax called Destructuring Assignment. That makes the code shorter and easier to follow. Of course it gets some time to practice it.
Note that even in the map loop, we are only allowed to return a single root element. If we don’t want any DOM element to be rendered as a wrapper we can use an empty <>. This is a syntactic sugar for React.Fragment.
Now that we learned how to create React components, let’s create more. Our goal is to separate the concern of the tweet from the actual application. Then we can add some styling.
Displaying our tweets
Let’s create a new component src/components/Tweet.jsx with the following code:
function Tweet(props) {
  const { user, createdOn, children } = props

  return (
    <div className="tweet">
      <div className="tweet-header">
        <span className="tweet-user">@{user}</span> ·{' '}
        <span className="tweet-created-on">{createdOn}</span>
      </div>
      <div className="tweet-content">{children}</div>
    </div>
  )
}

export default Tweet
Our newly created <Tweet /> component is only responsible to render tweets. Now it is time for some theory lessons. It will help us understand what is actually happening here.
I suppose you are familiar with HTML attributes. For example an anchor tag has an attribute to set the href:
<a href="/">Home</a>Similar to HTML elements, React components can have their own attributes. For example our Tweet component has an attribute <Tweet name="nicotsou" /> which can be used from consumers to set the handle name for this tweet. It also has another attribute for the creation date.
There’s a reserved attribute called children. React uses this name convention for all the elements that you render inside this element.
This means that you are free to decide how to implement the api of your component. If you want your component to accept children, just use this prop.
In React there is also an easy way to do type checking. You can use a package called prop-types:
import PropTypes from 'prop-types'
function Tweet(props) {
  const { user, createdOn, children } = props

  return (
    <div className="tweet">
      <div className="tweet-header">
        <span className="tweet-user">@{user}</span> ·{' '}
        <span className="tweet-created-on">{createdOn}</span>
      </div>
      <div className="tweet-content">{children}</div>
    </div>
  )
}

Tweet.propTypes = {  user: PropTypes.string,  createdOn: PropTypes.string,}
export default Tweet
React will now check whether the types of the values match with the types you declared in your component implementation.
Note that we do not need to set a type for children, because we allow the consumers of our component to put anything they like.
Now here’s the good thing about this type checking system. It will only happen during development. This means while you are running your app locally. This part of the code will not be included in the actual application. That’s good right?
Of course nowadays we have some more sophisticated tools for type checking, like TypeScript or Flow. Since React is just a JS library, you can integrate it with any tool you like.
Another small note from my side. Notice that I’m using className instead of class. I guess you’ve read this JSX article I referenced before. No? Well, it looks like jsx has some tiny minor differences compared to HTML. Since class is a reserved word in JS, they had to come up with a different naming convention for classes that have to do with styling.
Ok that’s it! We made our first reusable React component.
To render our new component we have to modify /src/components/App.jsx as follows:
import tweets from '../tweets.json'
import Tweet from './Tweet'

function App() {
  return (
    <div className="timeline">
      {tweets.map(({ id, user, created_on, content }) => (
        <Tweet key={id} user={user} createdOn={created_on}>          {content}        </Tweet>      ))}
    </div>
  )
}

export default App
Notice the difference in the api. The json property created_on has been renamed to camelCase. Well that’s not a strict rule. You can name your attributes however you like. But, please don’t! Be a good person. Nobody uses kebab_case in HTML. 🙈
Also notice that the key attribute is only needed in the parent component and it doesn’t even appear in the <Tweet /> component.
Remember: Only when you render multiple React elements dynamically you have to provide a
key. The key is not meant to be used inside the children component.
Our app is finally ready, but it looks like the famous emoji (sic). We will deal with this in the following section.
Adding styles
When it comes to styling we have plenty of options in React. The simplest one is to use a style attribute:
<div className="tweet" style={{ marginBottom: '20px' }}>
  ...
</div>
In certain situations this can be useful. Especially when we have dynamic styles. Instead I will use the same pattern we used in the index.js file.
Next to our Tweets component, let’s add a new stylesheet file called /src/components/Tweet.css:
.tweet {
  padding: 10px;
}

.tweet-header {
  display: flex;
  justify-content: space-between;
  margin-bottom: 5px;
}

.tweet-user {
  font-weight: bold;
  color: rgb(29, 161, 242);
  padding-right: 5px;
}

.tweet-created-on {
  flex-grow: 1;
  padding-left: 5px;
  color: rgb(110, 118, 125);
}

.tweet-content {
  padding-left: 16px;
  padding-bottom: 20px;
}
Of course in order to make it work we would need to import this file in our Tweet.jsx:
import './Tweet.css';Not bad isn’t it? I would not call it art. At least not yet. But we are getting there… 🎨

If you followed everything until this point, your codebase will look like this: https://github.com/nicotsou/react-twitter/tree/step-2.
Next step: refactoring! 🧑🎨
Adding more components
I’m not 100% satisfied with the current version of our <App /> component. I am thinking to separate the logic of the timeline with the app itself. I take my notepad and after some thinking, I came up with the following sketch:

We have the following components:
ComposeForm, is just an input to post a new tweet.Timeline, is a list of tweets.Tweet, is a tweet that’s being tweeted by tweeters.Avatar, will be used to display profile photo circles.App, is the one that contains the compose form and the timeline.
Let’s transfer it in code. Before we start I want you to stop the project and install the following npm package:
npm install react-icons --saveWe want icons to make our app look awesome. Instead of downloading manually those svg files and importing them to our project, we are using a third-part package called react-icons.
We used to say “There’s an app for that” for mobile applications. Similarly, in React/JS you will find a lot of open source projects for everything you can imagine. It’s the perfect way to create a beautiful prototype for your app.
I’m now going to paste here the final version of my files. With the knowledge you gained so far, you can follow without me.
You know what? Let’s go with dark mode. We only need to change some styles in index.css:
body {
  margin: 0;
  font-family: sans-serif;
  background: black;  color: white;}

* {  box-sizing: border-box;}
We will begin with the /src/components/Timeline.jsx, which is very similar to our App component:
// Timeline.jsx
import PropTypes from 'prop-types'
import Tweet from './Tweet.jsx'
import './Timeline.css'

function Timeline({ tweets }) {
  return (
    <ul className="timeline">
      {tweets.map(({ id, user, created_on, content }) => (
        <li key={id} className="timeline-item">
          <Tweet user={user} createdOn={created_on}>
            {content}
          </Tweet>
        </li>
      ))}
    </ul>
  )
}

Timeline.propTypes = {
  tweets: PropTypes.array,
}

export default Timeline
This component now receives as a prop the tweets collection. For the sake of semantics, I have converted the div to an unordered list. Again, notice how we now use a key for every <li>.
Another thing to note here is how we access the tweets variable from the Timeline() function. Notice the {}. The following syntax is equivalent:
function Timeline(props) {
	const tweets = props.tweets;
}

function Timeline(props) {
	const { tweets } = props;
	...
}

function Timeline({ props }) {
	...
}
And here is its associated stylesheet /src/components/Timeline.css:
/* Timeline.css */
.timeline {
  margin: 0;
  padding: 0;
  border: 1px solid rgb(47, 51, 54);
}

.timeline-item {
  list-style: none;
  border-bottom: 1px solid rgb(47, 51, 54);
}

.timeline-item:last-child {
  border-bottom: none;
}
Now let’s add the Avatar component in /src/components/Avatar.jsx:
// Avatar.jsx
import PropTypes from 'prop-types'
import './Avatar.css'

function Avatar({ name = '' }) {
  return <div className="avatar">{name.charAt(0)}</div>
}

Avatar.propTypes = {
  name: PropTypes.string,
}

export default Avatar
This basically doesn’t display the image of the user, but it just renders the first letter of their username. Having access to profile images requires access to the X developer api. I thought this project is already too much for people who start with React and I didn’t want to introduce extra complexity. In a future post we will learn how to consume apis, by implementing more complex React applications.
Here’s the associated stylesheet /src/components/Avatar.css:
/* Avatar.css */
.avatar {
  border-radius: 50%;
  background-color: rgb(29, 161, 242);
  width: 50px;
  height: 50px;
  margin-right: 10px;
  flex: 0 0 auto;
  text-align: center;
  line-height: 50px;
  font-size: 1.3em;
  font-weight: 200;
  text-transform: uppercase;
}
We will now consume the Avatar component in /src/components/Tweet.jsx:
// Tweet.jsx
import PropTypes from 'prop-types'
import Avatar from './Avatar'
import './Tweet.css'

function Tweet(props) {
  const { user, createdOn, children } = props

  return (
    <div className="tweet">
      <Avatar name={user} />
      <div>
        <div className="tweet-header">
          <span className="tweet-user">@{user}</span>·
          <span className="tweet-created-on">{createdOn}</span>
        </div>
        <div className="tweet-content">{children}</div>
      </div>
    </div>
  )
}

Tweet.propTypes = {
  user: PropTypes.string,
  createdOn: PropTypes.string,
}

export default Tweet
And its associated stylesheet /src/components/Tweet.css:
/* Tweet.css */
.tweet {
  display: flex;
  ...;
}
... .tweet-content {
  padding-left: 3px;
  ...;
}
Now let’s create the compose form component in /src/components/ComposeForm.jsx:
// ComposeForm.jsx
import Avatar from './Avatar'
import './ComposeForm.css'

function ComposeForm() {
  return (
    <form className="compose-form">
      <div className="compose-form-container">
        <Avatar />
        <textarea
          className="compose-form-textarea"
          placeholder="What's happening?"
        />
      </div>
      <button className="compose-form-submit">Tweet</button>
    </form>
  )
}

export default ComposeForm
We haven’t implemented yet the functionality to tweet, but we are going to add some extra code in the following section. For now it helps to put all the layout together.
Here’s its associated stylesheet /src/components/ComposeForm.css:
/* ComposeForm.css */
.compose-form {
  display: flex;
  flex-direction: column;
  align-items: flex-end;
  padding: 10px;
  border: 1px solid rgb(47, 51, 54);
}

.compose-form-container {
  display: flex;
  width: 100%;
}

.compose-form-textarea {
  background: none;
  border: 0;
  outline: none;
  width: 100%;
  min-height: 70px;
  font-family: sans-serif;
  font-size: 1.2em;
  color: white;
}

.compose-form-submit {
  flex: 0 0 auto;
  padding: 5px 18px;
  width: auto;
  line-height: 28px;
  background-color: rgb(29, 161, 242);
  color: white;
  border-radius: 50px;
  border: 0;
  font-size: 0.9em;
  font-weight: bold;
}
Let’s put everything together into /src/components/App.jsx:
// App.jsx
import ComposeForm from './ComposeForm'
import Timeline from './Timeline'
import { FaX } from 'react-icons/fa'
import './App.css'

import tweets from '../tweets.json'

function App() {
  return (
    <div className="app">
      <FaX className="app-logo" size="2em" />
      <ComposeForm />
      <div className="separator"></div>
      <Timeline tweets={tweets} />
    </div>
  )
}

export default App
And its associated stylesheet /src/components/App.css:
/* App.css */
.app {
max-width: 600px;
margin: 0 auto;
margin-top: 20px;
}
.app-logo {
margin-bottom: 18px;
}
.separator {
background-color: rgb(21, 24, 28);
border: 1px solid rgb(47, 51, 54);
border-top: 0;
border-bottom: 0;
height: 10px;
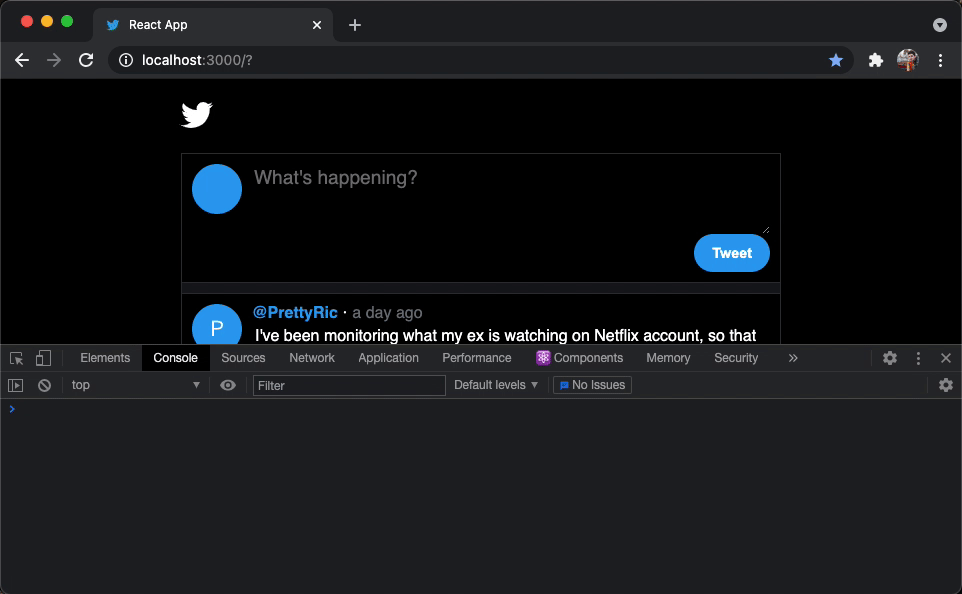
}That was it. Here’s the result UI:

And your codebase will look like this: https://github.com/nicotsou/react-twitter/tree/step-3.
This is basically an idea of how we build React apps. We start from a basic structure that makes more sense at that specific moment. We give it a try for a while. Later on, new requirements will come and we may want to restructure our app. Or our app stays forever like this, which is also fine.
Don’t think too much about how to break your app in components. It’s so easy to refactor your code. Go with what you think it makes more sense. This is an art you will learn as the time goes.
In the next session we will add interactivity to our UI elements.
Adding interactivity
So far we were dealing with the layout, by breaking our application in reusable components. We managed to display a list of tweets and a form that allows the user to post a new tweet. Learning how to deal with UI elements is the half side of the story.
Now we will go a step further. We will make those components interactive. At the moment, nothing is happening when you press the tweet button. And this is exactly where we will start from.
Let’s revisit our <ComposeForm /> component. To make an input interactive in React you have to actually store its value somewhere. The library provides an api for us. It’s called state.
We can add state to any React component with a function that React provides for us. It’s called useState() and here’s how you can use it:
// useState is a part of the React library - mind the {}
import { useState } from 'react'

function SomeComponent() {
  // We define a state variable called day.
  // useState() returns a pair of getter & setter within an array.
  // We use destructuring to assing them in variables of our choice.
  // useState() accepts the initial value as a parameter.
  const [day, setDay] = useState('Monday')  //       ^  ^                   ^
  // [getter, setter]             initial value (optional)
}
This is basically a hook. It’s a kinda complicated topic that you can read more about it in the official documentation. We will come back to this topic in more detail. I have another post for you. For now, learn its api and understand how React manages state.
Ok, it’s time for a small experiment. Take a look at the following example:
// ComposeForm.jsx
import { useState } from 'react'import Avatar from './Avatar'
import './ComposeForm.css'

function ComposeForm() {
  // As we've seen before, useState() returns an array
  // of [getter, setter] that we can name as we want.
  // We set the initial value of editorValue to an empty string.
  const [editorValue, setEditorValue] = useState('')
  // Before we return anything, we log the current value
  console.log(editorValue)
  // We define a handler for the onChange event of our textarea
  const handleEditorValueChange = (e) => {    setEditorValue(e.target.value)  }
  return (
    <form className="compose-form">
      <div className="compose-form-container">
        <Avatar />
        <textarea
          value={editorValue}          onChange={handleEditorValueChange}          className="compose-form-textarea"
          placeholder="What's happening?"
        />
      </div>
      <button className="compose-form-submit">Tweet</button>
    </form>
  )
}

export default ComposeForm
Here notice that the onChange attribute of our <textarea> is assigned to the handleEditorValueChange function without calling it. In case you are not familiar with this syntax, this is a feature of JS that allows you to pass functions as plain variables.
Remember this console.log() that we put in our component? I want to show you something. Try to type a message in the textarea and check the console output:
Let’s break down what exactly is happening here:
- Our component will be initially rendered. In the very beginning the value of our state element is an empty
""string. - The user interacts with the
textarea. In every keystroke, theonChangeevent is being triggered, which is handled by the functionhandleEditorValueChange(e). - Inside the implementation of this handler function, we call
setEditorValue(newValue)to update the state variable. - React re-renders the current component. Every time we update a state variable, the component gets re-rendered. That’s why you need the
useState()hook. - In this second render of the
<ComposeForm />component, the value of our state variableeditorValuewill now contain the newly saved value. - The user presses another key and the process repeats from step 2.
Every time the onChange event of the textarea is being triggered, our component is being re-rendered. That’s how React works.
At first we describe our UI with pure JS functions. Then for every event that occurs inside our component, we update the state. This causes the component tree from that point and below, to be re-rendered.
In our example above, the <ComposeForm /> component was updating its own state. But state can live in a parent component, if you pass the state variable as a prop to a children component. The state can live in the same level or above, but never below.
That’s exactly what we want to achieve with our tweets. When the user adds a new tweet, we want to append it to the list of tweets we are currently displaying on screen. But the <ComposeForm /> component doesn’t know anything about tweets. The <App /> component does. We would need to lift the state up.
But first let’s take a pause.
To implement this functionality we have to automatically generate unique ids for our tweets. This usually happens on the server, but for simplicity we are going to dynamically generate an id every time the user adds a new tweet.
There’s a very nice library for that. Stop the project and install it:
npm install nanoid --saveOk, now back to /src/components/App.jsx:
// App.jsx
import { useState } from 'react'import { nanoid } from 'nanoid'import ComposeForm from './ComposeForm'
import Timeline from './Timeline'
import { FaX } from 'react-icons/fa'
import './App.css'

import initialTweets from '../tweets.json'
// this is a way to store the current user name
const CURRENT_USER = 'nicotsou'
function App() {
  // We now store the tweets in the state of our component
  const [tweets, setTweets] = useState(initialTweets)
  // This handler will be called when we want to post a new tweet**
  const handlePostTweet = (content) => {    const newTweet = {      content,      id: nanoid(),      created_on: Date(Date.now()),      user: CURRENT_USER,      comments_count: 0,      retweets_count: 0,      favorites_count: 0,    }    // The new tweets array is being created from the values of the    // existing one + the newly created tweet    setTweets([...tweets, newTweet])  }
  return (
    <div className="app">
      <FaX className="app-logo" size="2em" />
      <ComposeForm onSubmit={handlePostTweet} />      <div className="separator"></div>
      <Timeline tweets={tweets} />
    </div>
  )
}

export default App
Here we declared a state variable tweets and we stored the contents of the tweets.json as the initial value for our array. Previously, our tweets collection was a constant value. Now it is possible to modify its contents.
We have created the handlePostTweet() function which can append a given tweet content to the tweets array. Who is triggering this function? The tweet button of course. But this button lives in the <ComposeForm /> component.
We need a way to connect this component with this function. To deal with that, we introduced a new prop onSubmit which accepts a function. The function will be called with the new tweet content.
We will take a moment here to understand what [...tweets, newTweet] does. It’s basically generating a new array, with the contents of the existing tweets array, by appending the new tweet object. Now you may ask me, why can’t we just use the .push() method to add another item to our array? Well, my friends, this is because we try to avoid mutation.
Mutation is a common side-effect in programming. When you touch existing objects to modify their values, you are mutating them. What you have to do instead is to return a copy of your array or object.
When you work with JS objects and arrays (which are also objects), you should avoid mutations. This makes your app run slower and it can also cause some state inconsistencies. Something that was supposed to be displayed, it simply doesn’t, although its value seems to be updated.
In JS there are several array methods that can cause mutations. Always check the implementation of these methods, before you use them.
Let’s add this implementation to ComposeForm.jsx:
import PropTypes from 'prop-types'import { useState } from 'react'
import Avatar from './Avatar'
import './ComposeForm.css'

function ComposeForm({ onSubmit }) {
  const [editorValue, setEditorValue] = useState('')

  const handleEditorValueChange = (e) => {
    setEditorValue(e.target.value)
  }

  const handleSubmit = (e) => {
    // Prevent the default behavior of the form submission
    // which usually triggers a page reload
    e.preventDefault()    // Call the onSubmit function with the latest textarea value
    onSubmit(editorValue)    // Reset the textarea content
    // the user may wants to write another tweet
    setEditorValue('')  }

  return (
    <form className="compose-form" onSubmit={handleSubmit}>      <div className="compose-form-container">
        <Avatar />
        <textarea
          value={editorValue}
          onChange={handleEditorValueChange}
          className="compose-form-textarea"
          placeholder="What's happening?"
        />
      </div>
      <button className="compose-form-submit">Tweet</button>
    </form>
  )
}

ComposeForm.propTypes = {  // Mind the isRequired flag,
  // if we don't provide any function it will trhow an error
  onSubmit: PropTypes.func.isRequired,}

export default ComposeForm
We made it! Here’s how this works:
- Every time we submit the form (click on the Tweet button), the
<ComposeForm />component will trigger theonSubmit()event. - This will be handled by the
handlePostTweet()handler inside the<App />component, which will update the list oftweets. - What will happen next? Well, the
<App />component will be re-rendered, because its state has changed. Of course this applies to all the components below it. - The
<Timeline />component will now display the all newtweetslist, which of course, includes the tweet that was posted.
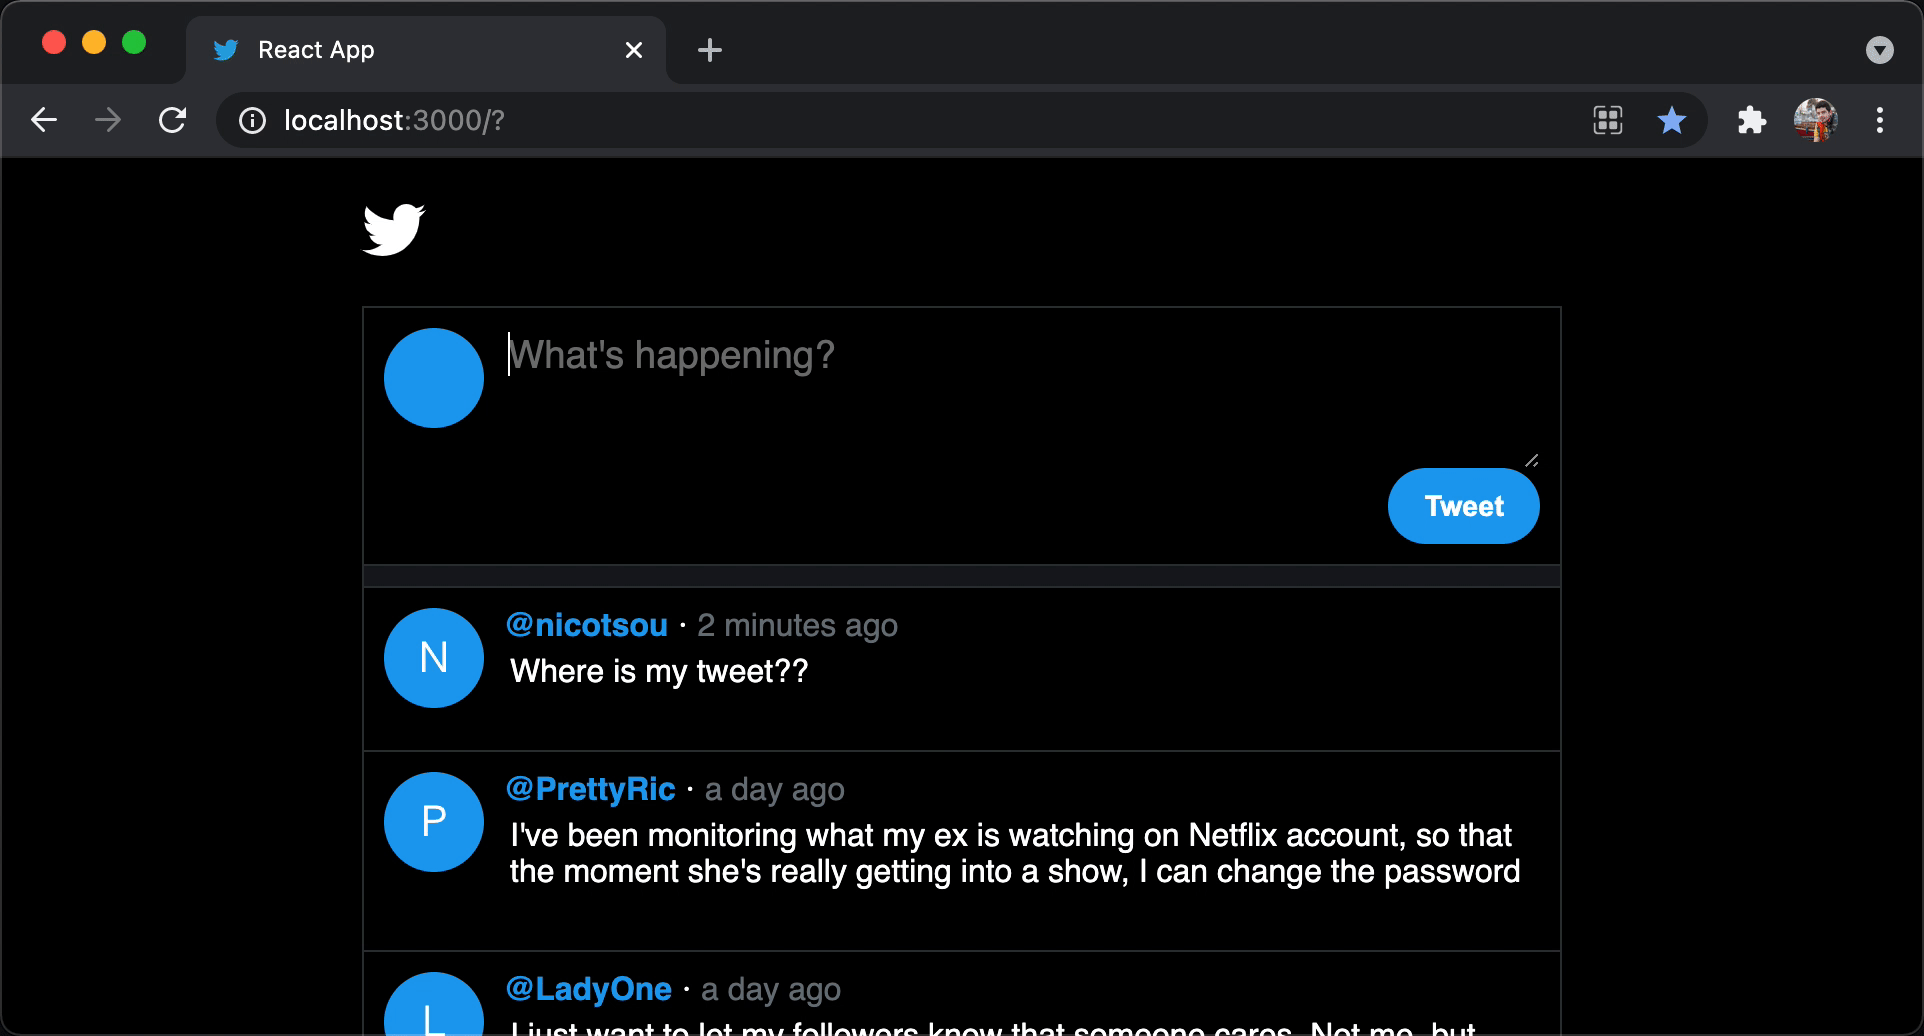
Well, there’s a catch here. We implemented the functionality to add a new tweet. But the UX is kinda annoying:

We don’t see the newly added tweet on top of the list, but we have to scroll all the way down to find it. That’s because our list of tweets is not ordered by date. We display the tweets in the same order we received them from the json file.
Here’s how you can quickly sort those tweets:
// Timeline.jsx
<ul className="timeline">
  {tweets
    .sort((a, b) => new Date(b.created_on) - new Date(a.created_on))    .map(({ id, user, created_on, content }) => (
      <li key={id} className="timeline-item">
        <Tweet user={user} createdOn={created_on}>
          {content}
        </Tweet>
      </li>
    ))}
</ul>
Another issue that we have is the fact that the dates aren’t really readable. We want something closer to how X displays the dates.
To deal with this issue, we will have to install another npm package:
npm install moment --saveI think JS folks know this one pretty well. There’s no better library to deal with dates other than moment. Here’s what we can do with it:
// Tweet.jsx
import moment from 'moment'import PropTypes from 'prop-types'
import Avatar from './Avatar'
import './Tweet.css'

function Tweet(props) {
  const { user, createdOn, children } = props

  return (
    <div className="tweet">
      <Avatar name={user} />
      <div>
        <div className="tweet-header">
          <span className="tweet-user">@{user}</span>·
          <span className="tweet-created-on">
            {moment(createdOn).fromNow()}          </span>
        </div>
        <div className="tweet-content">{children}</div>
      </div>
    </div>
  )
}

Tweet.propTypes = {
  user: PropTypes.string,
  createdOn: PropTypes.string,
}

export default Tweet
Moment reads the dates and converts them to a very readable text. Now our newly created tweet goes on top of the list:
And that, ladies and gentlemen, was the implementation of the compose tweet form. I know, it can be trickier than you initially anticipated. React can be a little hard to get in the beginning. But once you understand this reactive nature of the library, you’re gonna fall in love with its simplicity.
Your codebase will look like this after applying all the changes: https://github.com/nicotsou/react-twitter/tree/step-4.
Exercises
We are approaching the end of this post, but the fun has just started. 🤩
I have prepared a couple of simple features you can implement to our twitter clone. Most of them are easy, others may require some extra effort from your side, especially if you are a beginner in JS and Node.js. But definitely it’s a good start.
I have committed the solutions as separate branches. I encourage you to spend some time trying to implement those features, without looking on my solutions. Partially because your solution could be much better than mine. And of course, because you have to practice what you’ve learned.

Here’s what you can work on:
- Display counters for comments, retweets, favorites and the share button. The last one doesn’t have any counter. You can use the icon library we have already installed. I don’t want to give you more instructions. You can place the buttons wherever you think they fit better.
- Implement share button functionality. For the sake of simplicity, we can just copy the tweet on clipboard. You can also include the name of the user who posted it, for example:
@nicotsou: "Tweet content". - Implement retweet button functionality. Similar to the previous one, we copy the contents of the tweet, but this time we post them as a new tweet. You can have a message like
Retweeted from @nicotsou: "Tweet content". - Implement favorites: The goal here is to store when the tweet is favorite or not. If the tweet is favorited you can change the color of the icon to red and you can increase its counter by 1. When we click on the favorite button again, restore the color and the counter. To keep the implementation simple, we will only implement this in the button and not involve the
tweetsobject. Of course if you refresh your browser window, no favorites will be kept. Not the best UX, but enough for us to get started.
Ah and it doesn’t have to finish today. Nobody is chasing you. 🥸 Take a break and come back to this post tomorrow or some other day. Try to apply what you’ve learned. It’s the best way to learn.
Deploying our app
Ok I hear you. You want to show your creation with your friends and family. Or let’s just pretend this is a final product that you eventually want to sell.
Please don’t, we don’t have the copyrights for this social media platform. 🤑 Well, do what you want. Just when they will ask you, you didn’t find this tutorial from me, ok?
To prepare our app for production we have to run the following command:
npm run buildThis will keep your processor busy for a while. Once it is ready, you will find a new /build folder in your repo.
After building your app, you can serve it in your local network by running the following command:
npx serve -s buildThis will serve the build folder on http://localhost:5000/.
You can find more information about hosting your app in the official create-react-app documentation.
Resources
- Here are the solutions for the exercises: 1, 2, 3, 4
- The official repo on GitHub.
- Read everything about React in the official documentation.
- We used create-react-app to build this app, which has its own documentation.
Cover Credit: Chris J. Davis


